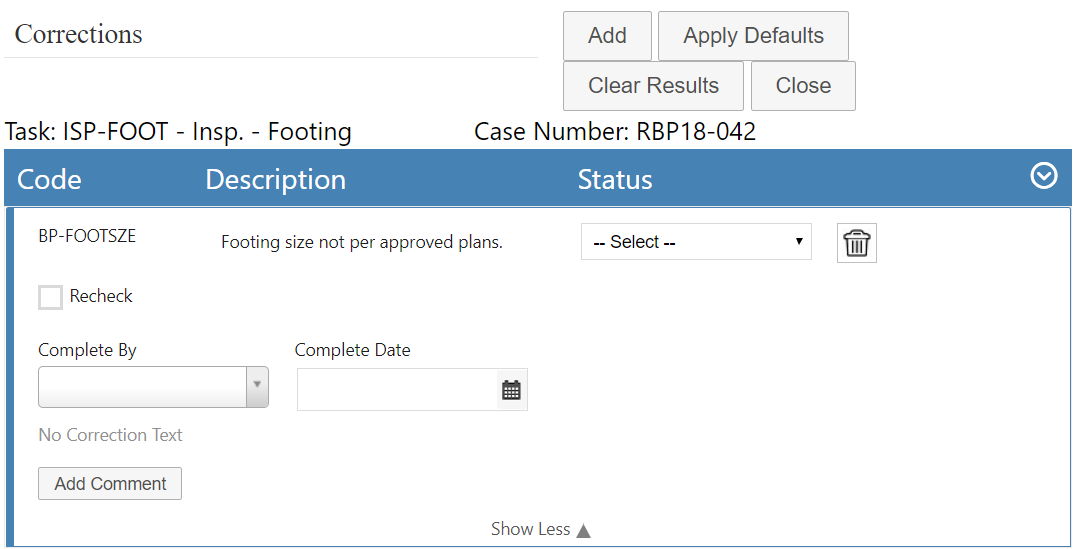
Correction Fields

  • Add: Click to open the Add Corrections panel.

  • Apply Defaults: Click to apply the default status (of the correction group the correction task is a part of) to all the correction tasks listed.
  • Clear Results: Click to clear the inspection checklist results. A confirmation opens to verify.

NOTE: This clears all results except for items that have been marked as "recheck."

  • Close: Click to close the Corrections window and save any changes made to correction tasks.
  • Status: Select the status for the correction from the drop-down list, such as if it passes or fails or is approved or should be resubmitted. The result codes available in the drop-down list vary depending on the correction.
  • Re-Check: Select this check box to mark that the correction has not been satisfactorily completed.
  • Complete By: This field automatically populates with the login ID of the current user. If needed, click the drop-down list and select a new user's ID to change the user.
  • Complete Date: This field automatically populates with the current date. If needed, click the calendar icon to change the date.
  • Add Comment: Click Add Comment to add additional information. This is used to indicate what must be done to ensure that the correction task passes the recheck. See the Comments section for more information on comments.