Create a Case
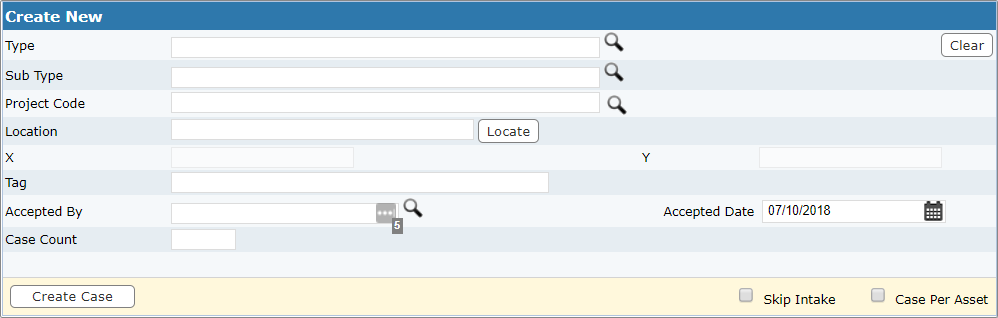
Once a case template is created, you can create a new permit, business license, or code enforcement from the Create New panel.
|
|
 PREREQUISITES:
- To create a new case,
 TIP: You can add a menu item to the main toolbar to easily access the Create New page using the Configure the Cityworks Toolbar in Designer Office Companion 23 Guide, or enter CWPermit/UF/Case/Page/CreateCase.aspx after your site's name in your browser's URL.
 NOTE: This page cannot be customized via the XML files.
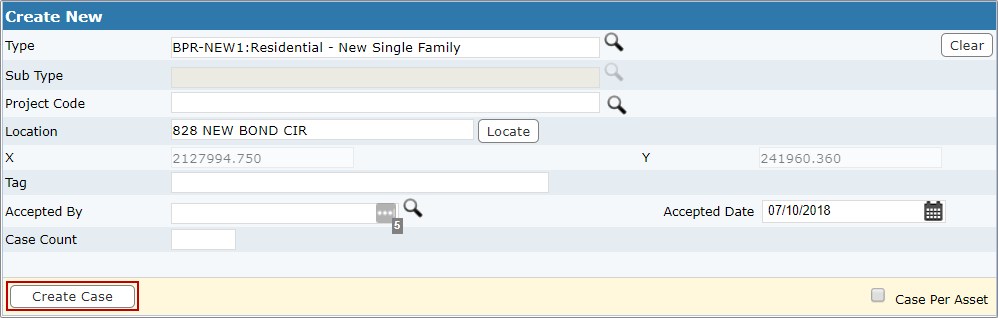
- Begin typing in the Type field to generate a filtered list of case types, or
- Select a case type and
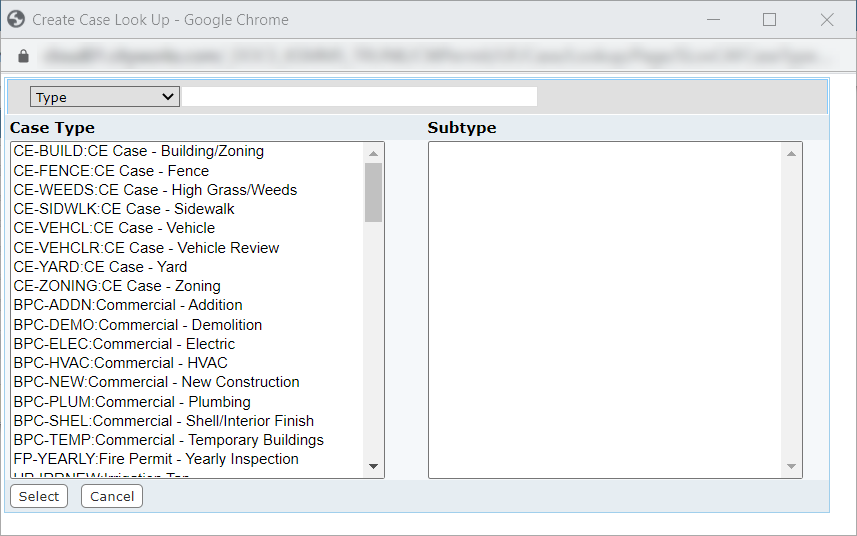
- If your organization uses subtypes, select a Sub Type in the same manner as you did the Type. If the case type selected does not have any subtypes associated to it, the Sub Type field is unavailable.
NOTE: See Case Types and Sub Types: Two-Tier Template Organization on MyCityworks for more information.
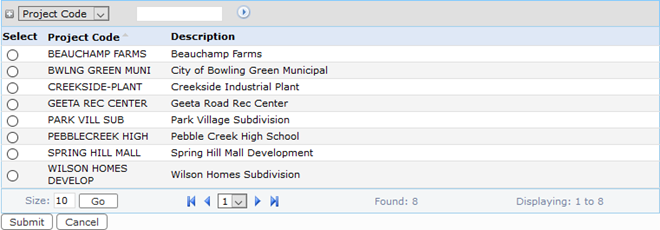
- If you want the case tied to a specific project, begin typing in the Project Code field to generate a filtered list of projects, or
- Select a project and
- Enter an address in the Location field and
NOTE: If the Location field on the Main panel is empty and a user adds a geolocated address in the Add Address panel, the Location field is populated on the Main panel when the case is saved.
- A Tag is a name for an individual case. Entering a tag is not required, but can be useful in tracking and organizing large projects that comprise many different cases.
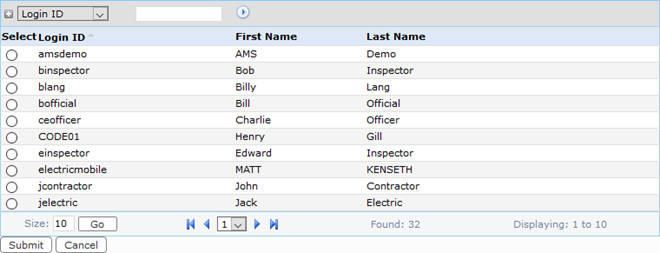
- Enter the login ID of the person accepting the case in the Accepted By field, or use the Lookup icon to select an employee using a selection window.
- Select an employee, and
- The Accepted Date is automatically populated with the current date. However, the date can be changed by
- Enter the desired number of cases you wish to create in the Case Count field. If this field is left blank, only one case is created.
- Select the Case Per Asset check box, if desired.
If the Case Per Asset check box is selected, Office for PLL creates the same number of cases as the number of attached assets. For example, if there are four assets attached on intake, four cases are created, one for each asset.
 IMPORTANT: If you use Case Count in conjunction with Case Per Asset, you will receive an error.
- Select the Skip Intake check box if you want to skip the application input page and move directly to the
NOTE: The Cityworks administrator has the ability to hide this check box as well as make it selected by default for the end user. See Add a Case Template in the PLL Admin Office Companion 23 Guide for more information.
See Application Input Page or Summary Page depending on how the template is set up by your administrator to complete the process of creating a case.
NOTE: See Create New Panel Fields for an explanation of the Create New panel fields.